
This manual provides essential guidance for installing, operating, and maintaining Watts pressure regulators, ensuring optimal performance and safety in water systems.
1.1 Overview of the Watts Pressure Regulator
The Watts Pressure Regulator is a high-quality device designed to reduce incoming water pressure to a safe and consistent level, protecting plumbing systems from damage. It features a durable diaphragm and spring-based mechanism that automatically adjusts to maintain preset pressure. Suitable for residential and commercial applications, this regulator ensures optimal water flow while preventing over-pressurization. Available in various models, it supports both vertical and horizontal installations, offering flexibility for different setups. Proper installation and adjustment are critical to ensure reliable performance and longevity. Refer to the manual for specific instructions tailored to your model and application needs. Always follow safety guidelines to avoid system damage or malfunction.
1.2 Importance of Proper Installation and Maintenance
Proper installation and maintenance of the Watts Pressure Regulator are crucial for ensuring safe and reliable operation. Incorrect installation can lead to leaks, noise, or system over-pressurization, potentially causing damage to plumbing fixtures. Regular maintenance, including cleaning and inspecting wearable parts, helps prevent premature wear and ensures optimal performance. Failing to maintain the regulator can result in inconsistent water pressure, reducing the lifespan of the device and connected systems. Always follow the manufacturer’s guidelines for installation and upkeep to guarantee safety, efficiency, and longevity of the regulator. Neglecting these steps may void the warranty and compromise system integrity.
Installation Instructions for the Watts Pressure Regulator
Follow step-by-step instructions for proper installation, ensuring the regulator is positioned correctly with the arrow on the body pointing toward the water flow direction. Use a pressure gauge to verify settings after installation.
2.1 Step-by-Step Installation Guide
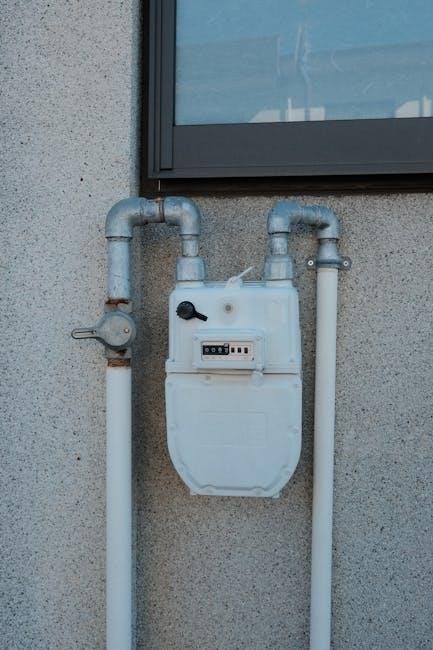
Begin by installing the regulator on the cold water supply line to the boiler, either vertically or horizontally. Ensure the arrow on the regulator points toward the water flow direction. Next, connect the piping securely, using appropriate fittings to avoid leaks. Install a needle valve in the control line for precise pressure adjustments. After connecting, turn on the water supply slowly and check for leaks. Use a pressure gauge to verify the outlet pressure matches the desired setting. For electric models, ensure the power supply is connected according to the manual. Finally, flush the system to remove debris and test the regulator’s performance under normal operating conditions.
2.2 Importance of Proper Location and Orientation

Proper location and orientation of the Watts pressure regulator are crucial for optimal performance and safety. Install the regulator on the cold water supply line to the boiler, ensuring it is positioned either vertically or horizontally with the arrow pointing toward water flow. Avoid areas exposed to high temperatures, contaminants, or mechanical stress. Correct orientation ensures the regulator operates efficiently and prevents damage. Improper placement can lead to inaccurate pressure regulation, reduced lifespan, or system damage. Always follow the manufacturer’s guidelines for installation location to maintain system integrity and ensure compliance with safety standards. Proper positioning also simplifies maintenance and troubleshooting processes.
2.3 Key Components and Tools Required
The Watts pressure regulator includes essential components like the adjusting bolt, lock nut, and diaphragm. Tools needed for installation include an adjustable wrench, screwdriver, and pressure gauge for accurate adjustments. Ensure the regulator is compatible with your system’s specifications. For models like Series 1156F or 127W, additional components such as unions or needle valves may be required. Always refer to the specific model’s instructions for detailed tool requirements. Using the correct tools ensures proper installation, prevents damage, and guarantees optimal performance. Adhere to the manufacturer’s guidelines for compatibility and safety standards to avoid system malfunctions or premature wear. Proper preparation is key to a successful installation process.

Adjusting the Pressure Setting
Loosen the lock nut and turn the adjusting bolt clockwise to increase pressure or counter-clockwise to decrease it. Always use a pressure gauge for precise adjustments.
3.1 Understanding the Factory Preset Pressure
The Watts pressure regulator is factory preset to 50 psi (344 kPa), ensuring a standard starting point for most residential and light commercial applications. This preset pressure is designed to balance water flow and system protection. However, adjustments may be necessary based on specific installation requirements. Users should verify the pressure setting after installation to ensure it meets their system’s needs. Always refer to the manual for guidance on how to safely adjust the preset pressure. Proper understanding of this feature ensures optimal performance and longevity of the regulator in various water supply conditions.
3.2 How to Increase or Decrease Pressure
To adjust the pressure setting, loosen the lock nut and turn the adjusting bolt clockwise to increase pressure or counter-clockwise to decrease it. Use a pressure gauge to verify the setting accurately. Small adjustments are recommended to avoid over-correction. After adjusting, tighten the lock nut to secure the setting. Always follow the manual’s instructions for safe and precise modifications. Proper adjustment ensures the regulator operates within the desired range, maintaining system efficiency and safety. Regular checks with a pressure gauge are essential to confirm the set pressure remains consistent over time.
3.3 Using a Pressure Gauge for Accuracy
A pressure gauge is essential for ensuring accurate adjustments to the Watts pressure regulator. It allows you to verify the exact pressure setting, helping you avoid over- or under-adjustment. Always connect the gauge downstream of the regulator to measure the outlet pressure accurately. Use the gauge to monitor pressure changes as you adjust the regulator, ensuring the setting aligns with your system’s requirements. Regularly checking with a pressure gauge helps maintain consistent pressure levels and prevents potential issues like over-pressurization or low pressure. This step is critical for optimizing performance and safety in your water system.
Maintenance and Inspection
Regular maintenance ensures optimal performance and longevity. Clean and test the regulator periodically and replace any worn parts to maintain efficiency and safety in the system.
4.1 Regular Cleaning and Testing
Regular cleaning and testing are crucial for maintaining the efficiency and reliability of the Watts pressure regulator. Start by flushing the system to remove any debris or sediment that may accumulate. Inspect the regulator’s components, such as the diaphragm and spring, for signs of wear or corrosion. Use a soft cloth to clean surfaces and avoid harsh chemicals that could damage the parts. Testing the regulator involves checking the output pressure with a gauge to ensure it matches the set pressure. If adjustments are needed, refer to the manual for guidance. Regular maintenance prevents issues like leaks or noise and ensures optimal performance over time.
4.2 Replacing Wearable Parts
Replacing wearable parts in your Watts pressure regulator is essential for maintaining its performance and longevity. Begin by turning off the water supply and draining the system to ensure safety. Identify worn components such as the diaphragm, O-rings, or springs, which are prone to degradation over time. Obtain replacement parts from authorized suppliers to guarantee compatibility and quality. Carefully disassemble the regulator, taking note of each part’s position for proper reassembly. Install the new components, ensuring they are securely fastened to prevent leaks. After reassembling, turn the water supply back on gradually and check for any leaks or unusual noises. Regular replacement of wearable parts prevents malfunction and ensures consistent pressure regulation. Always refer to the manual for specific instructions and safety precautions.
4.3 Ensuring Longevity of the Regulator
To ensure the longevity of your Watts pressure regulator, regular maintenance is crucial. Clean or replace filters and screens to prevent debris buildup, which can damage internal components. Inspect the regulator for signs of corrosion or wear, especially in harsh water environments. Store spare parts in a dry, cool place to avoid degradation. Avoid exposing the regulator to extreme temperatures or pressures beyond its rated capacity. Perform routine checks on the diaphragm and seals, replacing them if they show signs of cracking or leakage. Properly drain the system before servicing to prevent water damage. By following these steps, you can extend the regulator’s lifespan and ensure optimal performance over time.
Troubleshooting Common Issues
Identify common issues like inconsistent pressure, leaks, or noise. Check the pressure gauge, inspect for blockages, and ensure proper installation. Consult the manual for detailed solutions.
5.1 Diagnosing Low or High Pressure Problems
Diagnosing low or high pressure issues involves checking the pressure gauge and ensuring it reflects the set pressure. If the pressure is inconsistent, inspect the regulator for blockages or improper adjustments. Verify that the lock nut is secure and the adjusting bolt is correctly positioned. Low pressure may indicate a faulty spring or clogged inlet, while high pressure could signal an improperly set regulator or excessive inlet pressure. Always refer to the manual for specific troubleshooting steps and adjustments to restore optimal performance and safety in your water system.
5.2 Addressing Leaks or Noise
Leaks or noise in the Watts pressure regulator often indicate improper installation or worn components. Inspect the regulator for loose connections or damaged gaskets, and tighten or replace them as needed. Noise may result from debris in the valve or improper pressure settings. Clean or replace faulty parts, such as the diaphragm or spring, to eliminate noise; If leaks persist, check for corrosion or mineral buildup and flush the system. Always refer to the manual for specific repair procedures. Addressing these issues promptly ensures reliable performance and prevents further damage to the regulator or connected plumbing system.

Compliance and Safety Standards
Watts pressure regulators comply with local and international safety standards, ensuring reliable operation and protection against over-pressurization. Adhere to installation guidelines to maintain certification and safety.
6.1 Meeting Local and International Regulations
Watts pressure regulators are designed to meet local and international safety standards, ensuring compliance with regulations like ASSE, NSF, and ISO. These certifications guarantee product reliability and safety, protecting users and systems from over-pressurization. Regular inspections and adherence to installation guidelines are crucial for maintaining compliance. Users must verify that the regulator meets specific regional requirements, as standards may vary. Always refer to the manual for detailed certification information and ensure all installations align with local codes. Compliance ensures optimal performance and longevity of the regulator, while also safeguarding against potential hazards. Proper certification is your assurance of a safe and reliable product.
6.2 Safety Precautions During Installation and Use
Always follow safety guidelines when handling the Watts pressure regulator to avoid potential hazards. Ensure the system is depressurized before installation or maintenance to prevent injury from sudden pressure release. Use a pressure gauge to verify settings, as incorrect adjustments can lead to system damage or safety risks. Avoid over-tightening connections, as this may cause damage to the regulator or adjacent components. Keep the area clear of debris and flammable materials. Regularly inspect the regulator for signs of wear or leaks, and replace worn parts promptly. Failure to adhere to these precautions may result in malfunction, property damage, or personal injury. Safety should always be the top priority.
This manual provides comprehensive guidance for the Watts pressure regulator, ensuring proper installation, maintenance, and troubleshooting for optimal performance and longevity in various water systems.
7.1 Summary of Key Points
The Watts pressure regulator manual emphasizes proper installation, adjustment, and maintenance to ensure optimal performance. Key points include setting the correct pressure, using gauges for accuracy, and regular inspections. Cleaning and replacing wearable parts, such as diaphragms, extends the regulator’s lifespan. Troubleshooting common issues like leaks or noise is also covered. Compliance with safety standards and adherence to local regulations are highlighted to ensure safe operation. By following these guidelines, users can maintain efficient water pressure and protect their plumbing systems from damage. Regular maintenance and timely repairs are crucial for long-term reliability and performance.
7.2 Final Tips for Optimal Performance
For optimal performance, ensure the regulator is installed in a location that avoids extreme temperatures and contaminants. Always use genuine Watts replacement parts to maintain reliability. Regularly inspect the diaphragm and springs for wear, and replace them as needed. When adjusting pressure, do so incrementally and verify with a gauge. Keep the regulator clean and free from debris to prevent malfunction. Consider consulting a professional for complex adjustments or repairs. Finally, always follow the manufacturer’s guidelines for maintenance and operation to ensure longevity and efficiency of the Watts pressure regulator in your water system.